Introduction
The final step of a Spindle Self Serve installation is to publish the website to make it external facing, i.e. allowing external users, such as customers to access the website.
It is recommended that Spindle Self Serve is installed using an SSL Certificate. This will need to be installed and available on the server.
Pre-requisite Firewall settings
- Port 443/HTTPS (Recommended) or port 80/HTTP must be open on the firewall and pointing at the web server.
- We recommend an SSL certificate is used. This must be installed and available on the web server. Either a wildcard certificate, e.g. *.mydomain.com, or a domain specific certificate, e.g. portal.mydomain.com.
Server and Router Settings
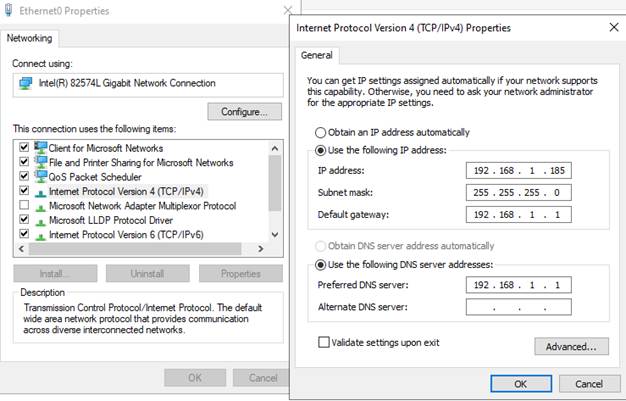
- A static internal IP address will need to be assigned to the server; this can be done under Network & Internet Settings > Change adapter options.
- Right click the network adapter, select Properties > Internet Protocol Version 4.
- Assign a static IP, subnet mask and gateway for the server.
- The static IP may need to be added to your router settings, along with the server’s MAC address to ensure connectivity this is usually within the network settings within your router configuration.

- Ensure port forwarding is set up on your router and/or firewall, forward port 80 and/or 443 to your server’s internal static IP. (80 for HTTP, 443 for HTTPS)

DNS Records
In this example, we will be setting up the DNS records as if the target website address would be www.domainname.co.uk, although this can be edited for any other type of website address required.
To add the required DNS record, we will need the server’s public IP address – this can be found easily on Google if it is not already known. (e.g. https://www.whatismyip.com/)
Login to your domain registrar’s control panel and open the DNS settings.

We will need to add a new A Record, with the below details:
Host Name: www
Points to: Public IP Address

Leave the TTL at the default 1 hour
SSL Certificate
It is likely that your domain provider will also provide you with an SSL certificate with your domain. While logged into your domain registrar’s control panel, navigate to the SSL certificate section. If your SSL certificate has not already been created, create it and note down the private key – this is important as it will likely not be shown again.
Now that the SSL certificate has been created, we need to download the file required to apply the SSL certificate to the website within IIS. With our example, we are using the IONOS portal, and we will download the “Create and Download .PFX File” option.


You will now see the above screen, where the private key will need to be entered in the top Private Key text box. You can then set a password in the password field, that will be used when adding the key to the server.
Now that the file is downloaded, we can add the file to the server and open the manage computer certificates control panel. Navigate to the Trusted Root Certification Authorities

Right click on the certificates folder and select All Tasks > Import, within the wizard you will be able to browse and select the .PFX file we previously downloaded, you will then be prompted to enter the password. You can then finish the wizard and move onto setting up the website to be external within IIS.

Internet Information Services (IIS) Manager – Adding Bindings and SSL Certificate (if applicable)
1. On the server that Spindle Self Serve has been installed on, open the Internet Information Services (IIS) Manager console available from Administrative Tools.
2. Open the branch on the left so that you can see the websites listed under ‘Sites’. The default name is ‘Draycir.SSS’, the site will be “stopped” as the bindings have not yet been set

3. Right-click the website and choose “Edit Bindings…”

4. Select Add…

5. Drop down the Type option and select http (no certificate) or https (use certificate), https is strongly recommended

6. In the hostname field enter the external URL that the SSL Certificate authenticates

- You must create a DNS record for your external domain name that points to your firewall/server. E.g. portal.mywebsite.com (Detailed in above steps)
7. If you have selected HTTPS and have a certificate for your domain name installed, select this from the SSL Certificate drop down menu

8. Click OK
9. In the Actions panel on the right of IIS, click Start

Your website should now be available.
10. The website now needs to be added to the Website URL (External) field on the Main tab in Settings in the main Spindle Self Serve site
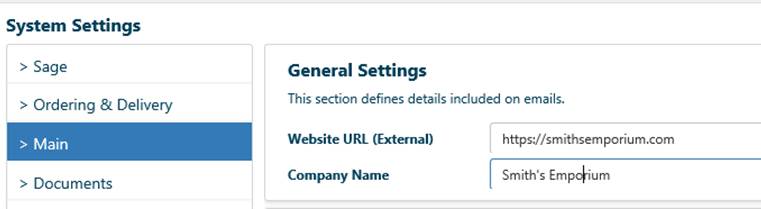
The External Website URL allows messages sent from Spindle Self Serve to contain the website address so that a link can be clicked to return to the website e.g.

Knowledge Base Article Details
| Related Product | Spindle Self Serve |
| Reference Number | KBA-09-01-004 |
| Document Date | 19/09/2025 |
| Original Author | Shannon Walker |
| Document Version | 1.0 |
| Last Updated | 19/09/2025 |
| Update Author | Shannon Walker |
Was this article helpful?
That’s Great!
Thank you for your feedback
Sorry! We couldn't be helpful
Thank you for your feedback
Feedback sent
We appreciate your effort and will try to fix the article