The Users section allows you to add, edit and remove users from Credit Hound. These users are global users and can access every company you have connected to Credit Hound.
Administrators Only!
You need to be an administrator to access Company Settings. If you are not an administrator then this option will not be available to you.
How to get to Users
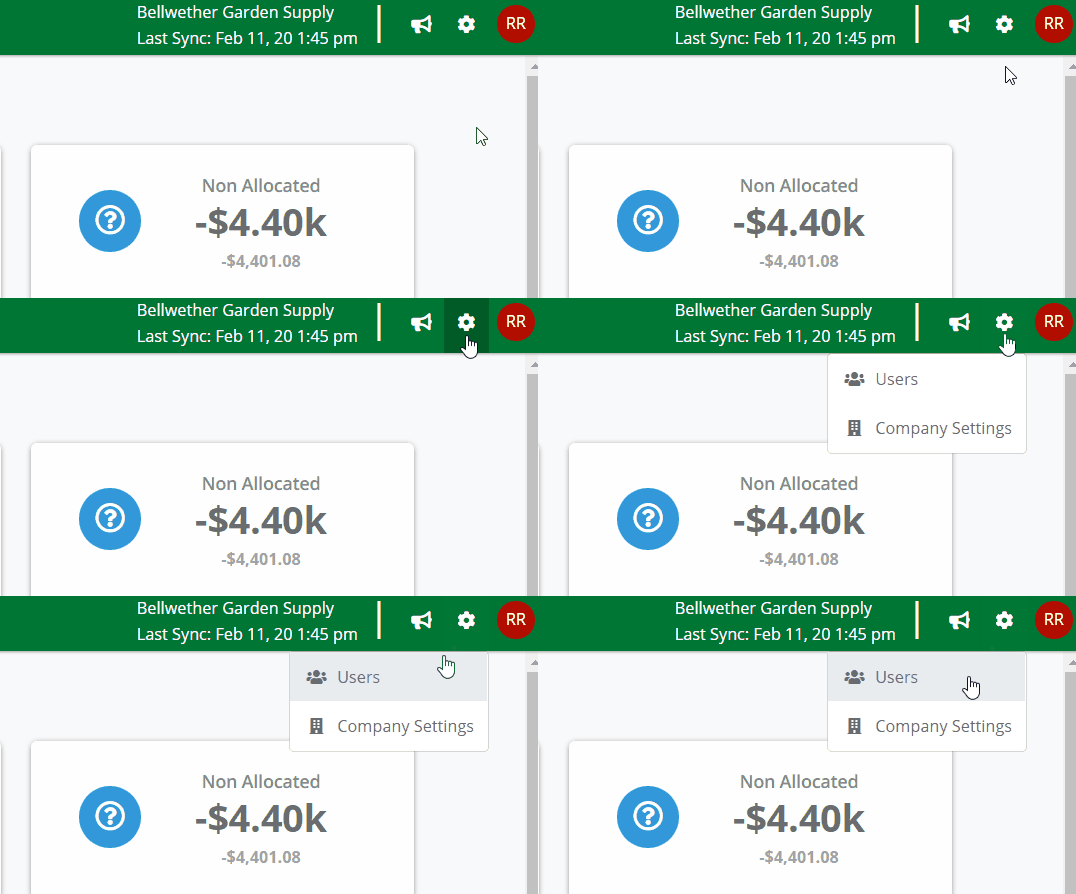
Users can be found under the Settings cog icon in the top-right hand corner of the screen. Click on the icon and when the menu appears click on Users.
 How to get to Users
How Many Users Do I Have?
This depends on your Credit Hound subscription and how many users you purchased. You can only have as many users as your subscription allows. For more information on your subscription please see Purchasing Credit Hound.
Add a User
To add a user following these steps.
- Go to Settings > Users (see above).
- Click the Add User button in the top-right corner. This opens the Add User screen.
 Add user screen
 - Enter the Name and the Email address of the user you want to add.
- Select the Role they should be, either an a Administrator or a Standard user (see below for the differences between the user types).
- Click the Add button.
- You will return back to the user list and a notification bar should appear stating the user has been created.
- The user should receive an email asking them to accept the invitation to join as a Credit Hound user. Please see Credit Hound User Invitation for more information.
Edit a User
To edit a user follow these steps.
- Go to Settings > Users (see above).
- From the user list, click on the user you want to edit.
 Edit user screen
 - You can edit the Name of the user but you cannot change the email address.
- You can change the Role of the user to either Administrator or Standard.
- Once you are happy with your changes, click Save.
- You will return back to the user list and a notification bar should appear stating the user has been updated.
Remove a User
To remove a user follow these steps.
- Go to Settings > Users (see above).
- From the user list, click on the user you want to remove.
 Remove user screen
 - Click Remove.
- The Remove User confirmation dialog appears. Click Remove to permanently remove the user.
 Remove user confirmation dialog
 - You will return back to the user list and a notification bar should appear stating the user has been removed.
Difference Between User Types
| Administrator User | Standard User |
|---|---|
| View all customer details | View all customer details |
| Chase customers | Chase customers |
| Send emails | Send emails |
| Invite other users to Credit Hound | Cannot invite other users to Credit Hound |
| Configure and manipulate Collection Paths | Cannot configure or manipulate Collection Paths |
| Configure Company Settings | Cannot configure Company Settings |
Knowledge Base Article Details
| Related Product | Credit Hound Cloud |
| Ref Number | KBA-07-02-01 |
| Document Date | 29/02/2020 |
| Original Author | https://docs.credithoundcloud.com |
| Document Version | 1.0 |
| Last updated | 18/07/2022 |
| Update Author | Shannon Walker |
Was this article helpful?
That’s Great!
Thank you for your feedback
Sorry! We couldn't be helpful
Thank you for your feedback
Feedback sent
We appreciate your effort and will try to fix the article