Company Settings allow you to configure global settings for the current company in Credit Hound.
How to get to Company Settings
Company Settings can be found under the Settings cog icon in the top-right hand corner of the screen. Click on the icon and when the menu appears click on Company Settings.
 How to get to Company Settings
Configuration Settings
This area allows you to solve issues with your connection, disconnect from your accounting system or perform a manual synchronization.
Accounting Connector
In the Accounting Connector section, you can see the cloud accounting system you have linked Credit Hound with and the Status of the connection to your accounting system.
 Configuration SettingsIf there is a successful connection to the accounting system, the Status will show Active.
 Communication Issue
If Credit Hound cannot communicate with the cloud accounting system, a warning will display against the Status advising there is a problem. To resolve the issue, click the Login button which allows you to re-authenticate with accounting system.
Disconnect
You can remove the connection to your accounting system by clicking on the Disconnect button. This will stop Credit Hound synchronizing your accounting data. If you wish to reconnect Credit Hound click the Login button and follow the on-screen instructions to re-authenticate the connection to the accounting system.
Perform Manual Sync
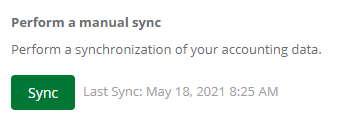 Manual Sync
Credit Hound automatically syncs to your accounts system periodically throughout the day. The last successful synchronization date and time next is displayed next to the Sync button.
At times you may have updated your accounting system (e.g. added new contacts, amended email addresses, added new transactions etc.) and require access to those changes in Credit Hound straight away. To do this you can perform a manual sync. Click the Sync button to start a manual synchronization of your accounting data.
When pressing the sync button you may see this message: If you attempt to click the Sync button and synchronize within 30 minutes of your last successful sync, Credit Hound will display an information message advising you cannot perform a Sync just yet and will have to wait.
This area allows you to configure the global settings for Collection Paths and how you can configure where Email Replies from your customers are sent to. Any changes made here will take effect across all users.
Email Settings
 Email Settings
Collection Paths
Collection Paths allows Credit Hound to chase your customers by automatically sending emails. This section allows you to define who the emails are sent as.
| From Name | The email display name that the recipient sees. This value is also used within the custom field {{senderName}} which is shown by default at the bottom of emails to denote the sender. |
| From Email | This will be used as the prefix part of the from email address. All emails sent from Credit Hound will be sent as [youremail]@credithoundcloud.com. |
The Email From Address is the address that outgoing Credit Hound emails are sent from. This is what is displayed to your customers in the From field inside their email client. For example, if your email address was accounts@draycir.com, the email address used when sending Collection Path emails would be accounts-draycir-com@credithoundcloud.com.
The Email Reply Address is the address that replies are sent back to and what is displayed to your customers when they click Reply in their email client. In Credit Hound, replies can either be sent back to Credit Hound or to your email client. See the Email Replies section below for more information on this.
Cc and Bcc email addresses into Collection Path emails

You can also specify email addresses that you would like to be Cc'd and Bcc'd into all outgoing emails sent via Collection Paths. Add new Cc recipients by typing out the recipient email address. You can add more than one email address by hitting Enter or Tab. Alternatively, you can use a semicolon or comma after each address.
Delete any recipients by clicking the 'X' icon next to them.
Follow the same steps for recipients that you would like to be Bcc'd into all outgoing emails sent via Collection Paths.
Email Replies
By default, if a customer replies to an email sent by Credit Hound, the reply email is captured and display in Credit Hound (e.g. in the Incoming Emails screen in the Communications area, or on the Customer Screen in the Activity panel). This is achieved by setting the reply-to address of the email to [unique-identifier]@credithoundcloud.com.
Enabling this option stops reply emails being sent to Credit Hound and instead sends them directly to the email address specified in the Email field for automated emails or the email address you use when logging into Credit Hound for manual emails. This means you will have to view the replies in your usual email client (Outlook, Gmail etc.), rather than Credit Hound.
Knowledge Base Article Details
| Related Product | Credit Hound Cloud |
| Ref Number | KBA-07-02-02 |
| Document Date | 29/02/2020 |
| Original Author | https://docs.credithoundcloud.com |
| Document Version | 1.0 |
| Last updated | 18/07/2022 |
| Update Author | Shannon Walker |
Was this article helpful?
That’s Great!
Thank you for your feedback
Sorry! We couldn't be helpful
Thank you for your feedback
Feedback sent
We appreciate your effort and will try to fix the article