This knowledge-based article showcases how to configure EDB to HTTPS as opposed to the standard HTTP.
TABLE OF CONTENTS
- Step 1: Generate Self-Signed Certificate in IIS
- Step 2: Bind the Self-Signed Certificate
- Step 3: Obtain a copy of the Self-Signed Certificate file
- Step 4: Install the Certificate on the Client Computer
- Step 5: Update EDB to work with HTTPS
- Knowledgebase Article Details
Step 1: Generate Self-Signed Certificate in IIS
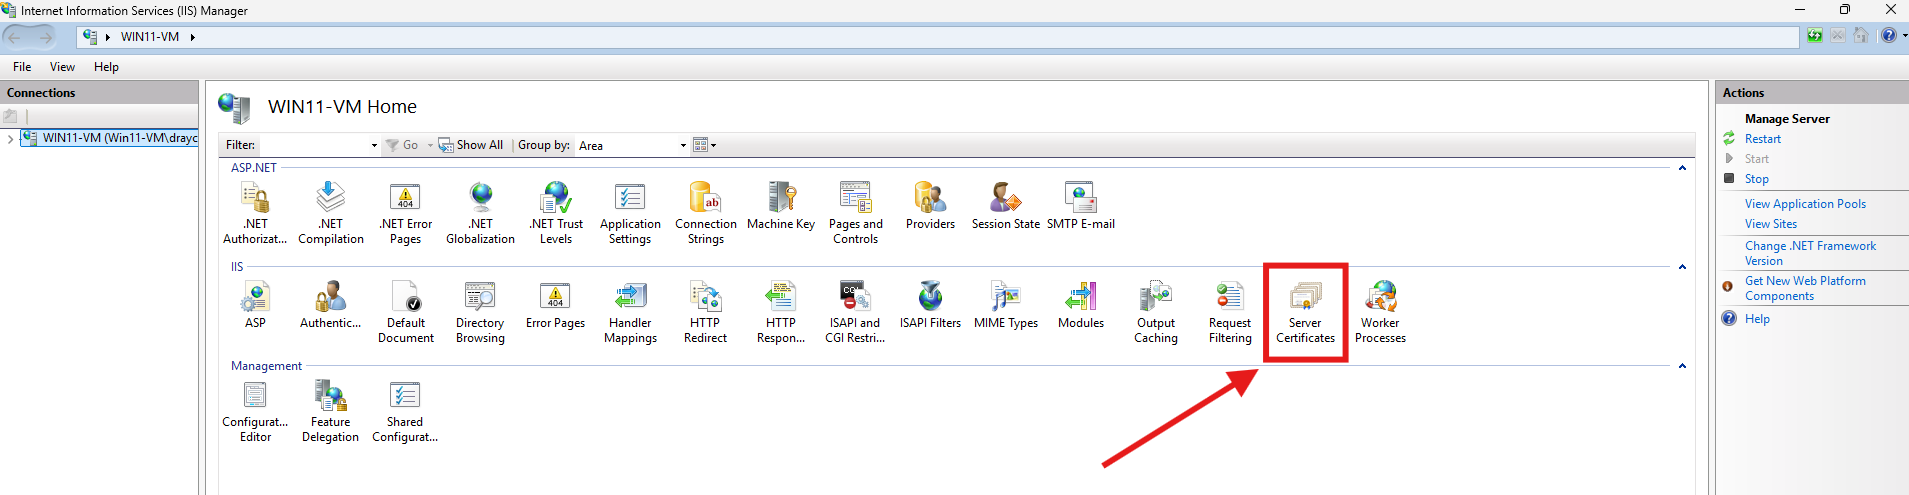
In the Actions column on the right, click on Create Self-Signed Certificate:

Enter any friendly name and then click OK: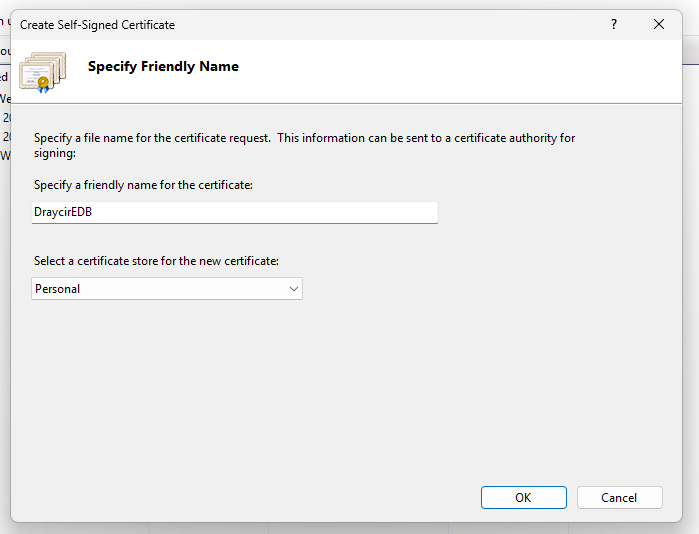
You will now have an IIS Self-Signed Certificate valid for 1 year listed under Server Certificates.
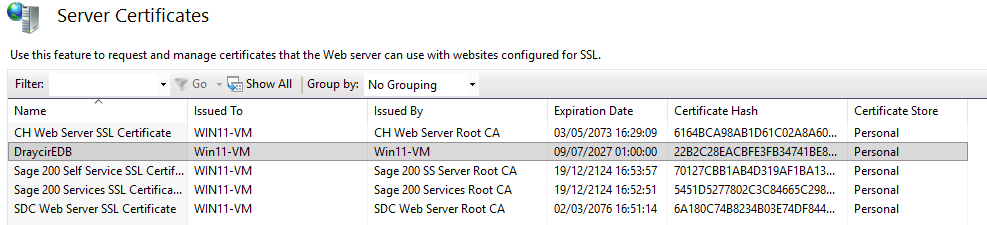
Now we need to bind the Self-Signed Certificate to the EDB websites.
Step 2: Bind the Self-Signed Certificate
In the Connections column on the left, expand the sites folder and click on the website that you want to bind the certificate to and click on Bindings… in the right Actions column.
The default installation of EDB is under Default Web Site on port 80, as follows: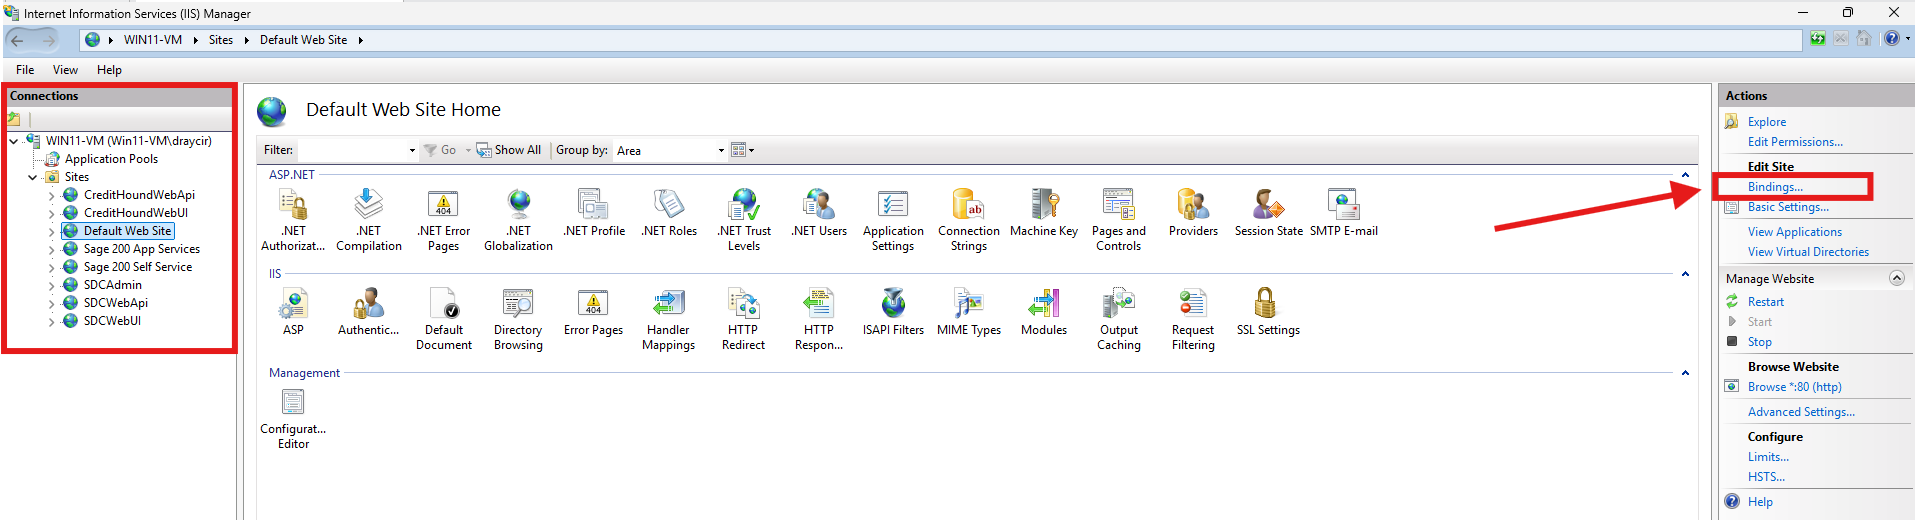
Click on the Add... button:
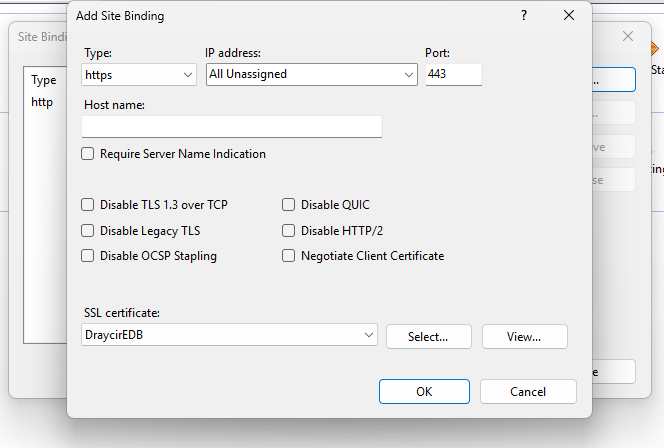
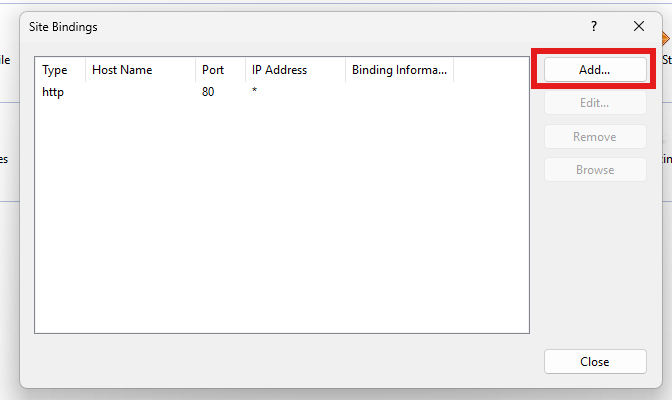 Change the Type to https and then select the SSL certificate you just installed.
Port 443 is the default for SSL, however this can be any valid port of your choice. The port specified cannot be one already being used across other website bindings. Click OK.
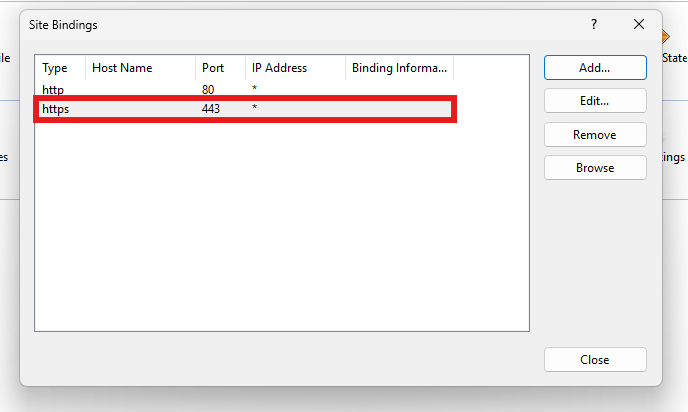
Step 3: Obtain a copy of the Self-Signed Certificate file
On the server used above to generate the self-signed certificate, from the start menu, find Run (Win + R), type in mmc, and then press OK.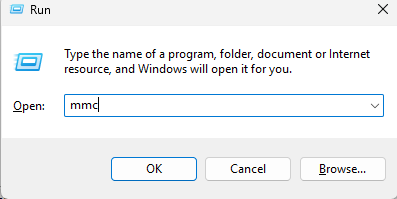
From the File menu, select Add/Remove Snap-in.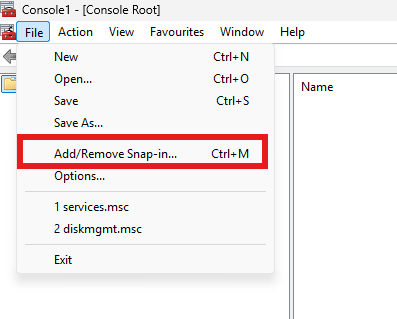
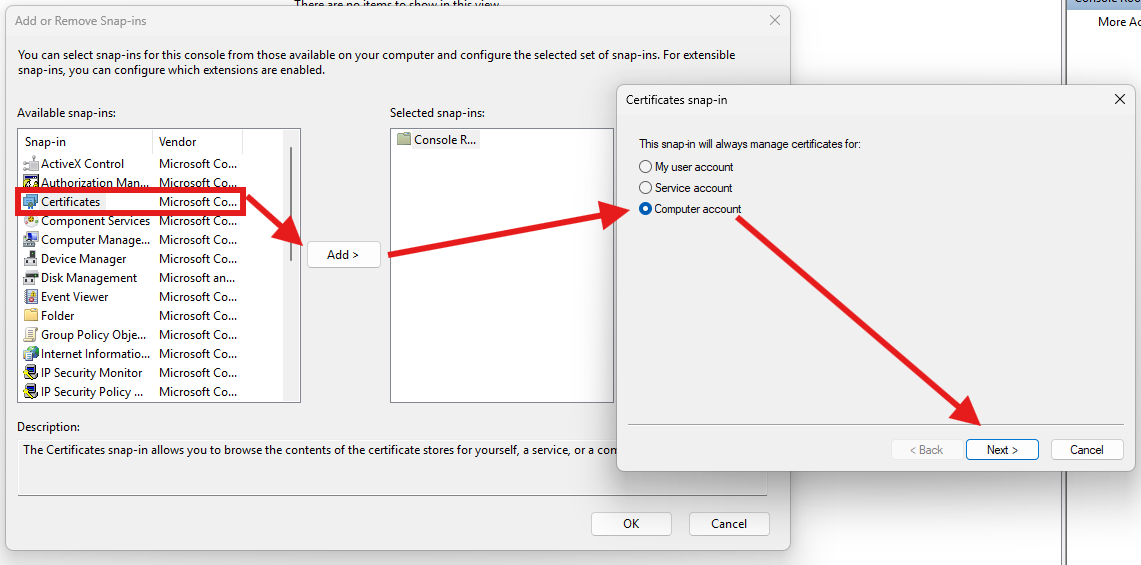
Select the Certificates snap-in, then click Add > to add it.
In the window that appears, select Computer account followed by Next.
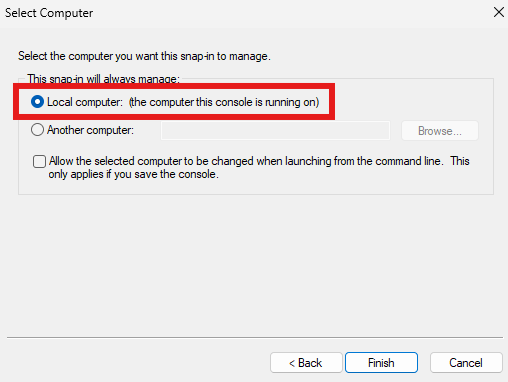
Within the select computer window, select Local Computer, and then click Finish.
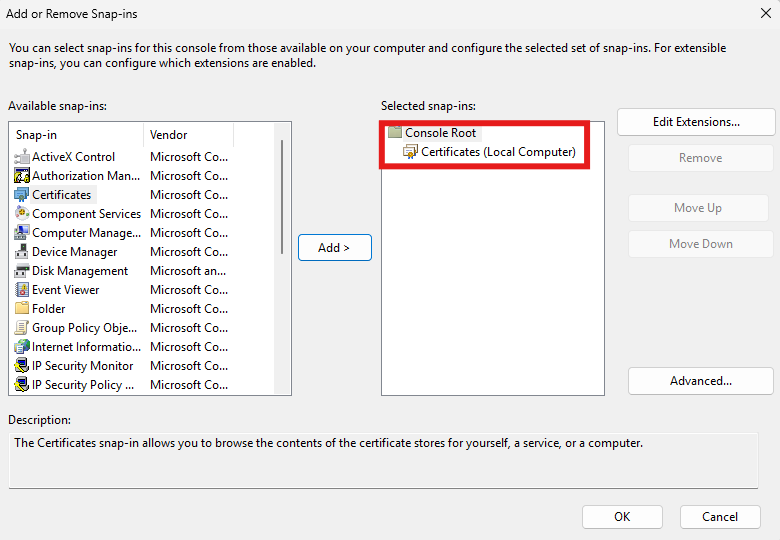

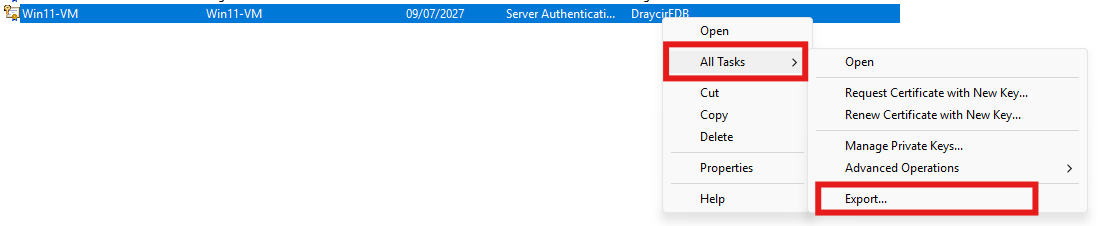
Keep clicking Next to accept the defaults in the wizard. When you’ve reached the File to Export screen, use the Browse… button to specify a file location and filename, and click Next then Finish. The certificate has now been exported.
You can now close the mmc application.
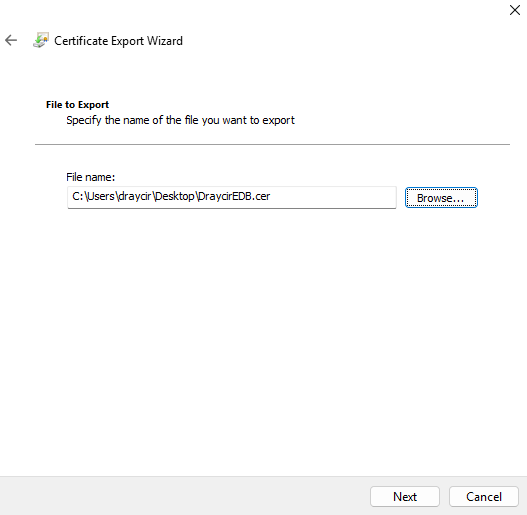
Use this exported certificate to complete the following step.
Step 4: Install the Certificate on the Client Computer
Currently, if you were to browse to https://servername/ExcelDataBridgeMaint from the client machine, you would receive the following: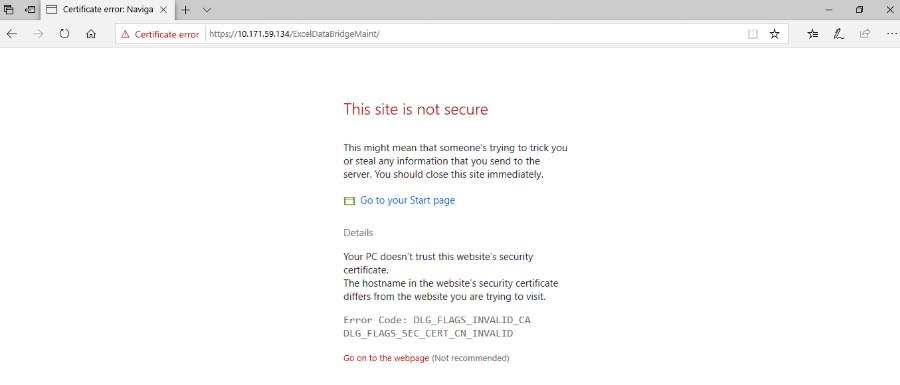
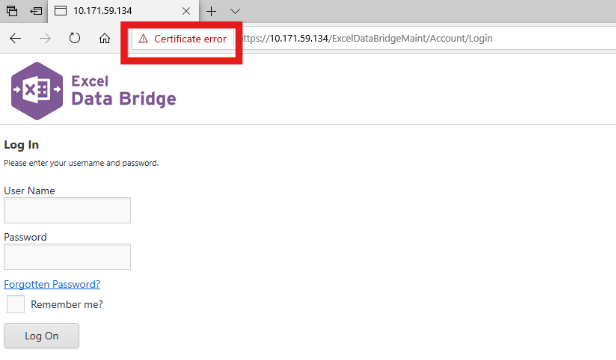
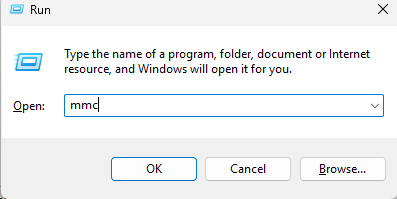
On the client computer, from the start menu, find Run (Win + R), type in mmc, and then press OK.
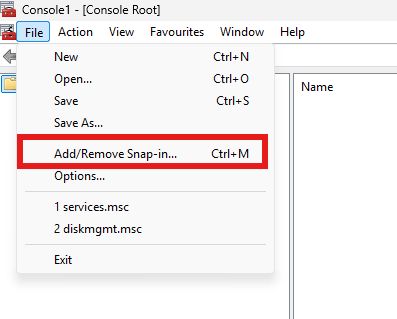
From the File menu, select Add/Remove Snap-in.
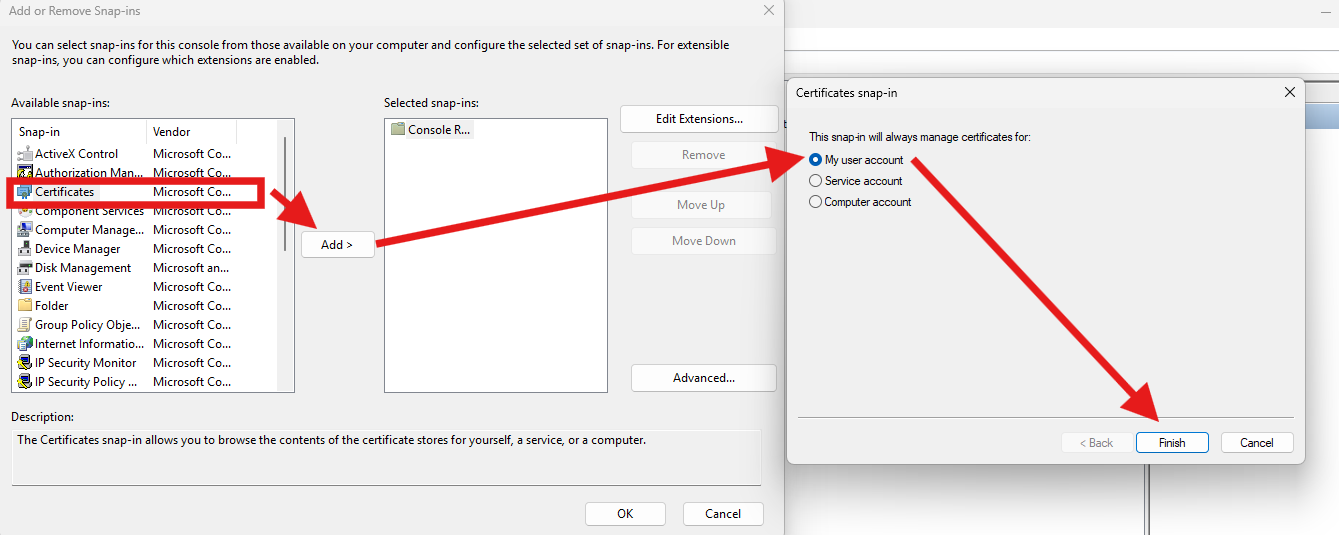
Select the Certificates snap-in, then click Add > to add it. In the window that appears, select My user account followed by Finish.
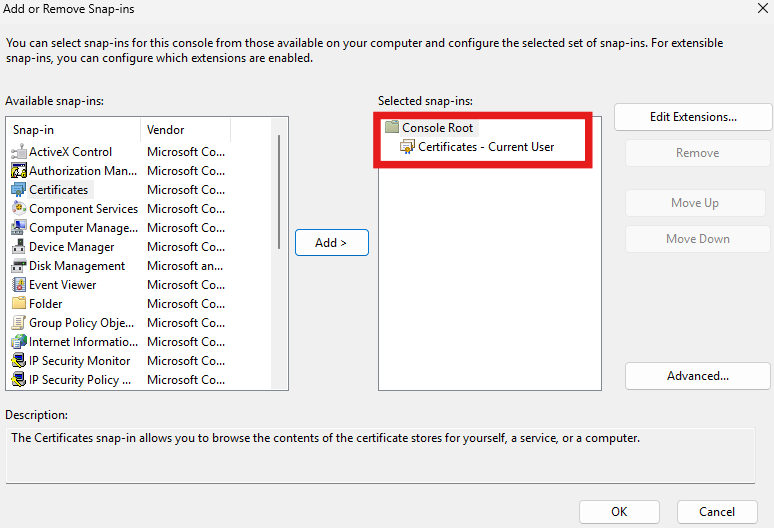
You should now see the Certificates (Current User) node added to the selected snap-ins pane. Click OK.
Within the left pane, under Console Root expand Certificates (Current User) to reveal the Trusted Root Certification Authorities folder. Expand the Trusted Root Certification Authorities folder to reveal the Certificates folder. Click on the Certificates folder, and select All Tasks > Import.
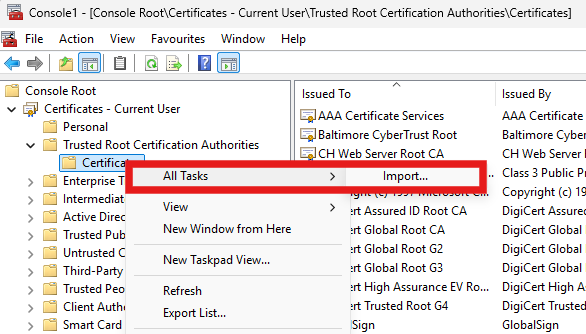
Click Next to appear on the File to Import screen. Here, use the Browse… button to load the certificate you exported earlier. Click Next to appear at the Certificate Store screen, which should have a summary matching the following:
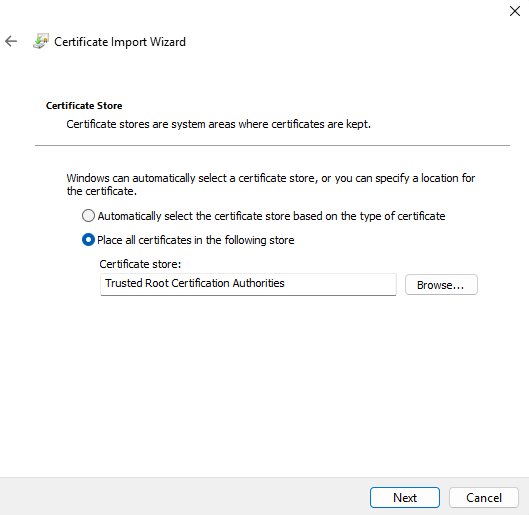
Click Next followed by Finish to complete the Import.
A security warning may be displayed, if this is the case, confirm Yes to install the certificate.
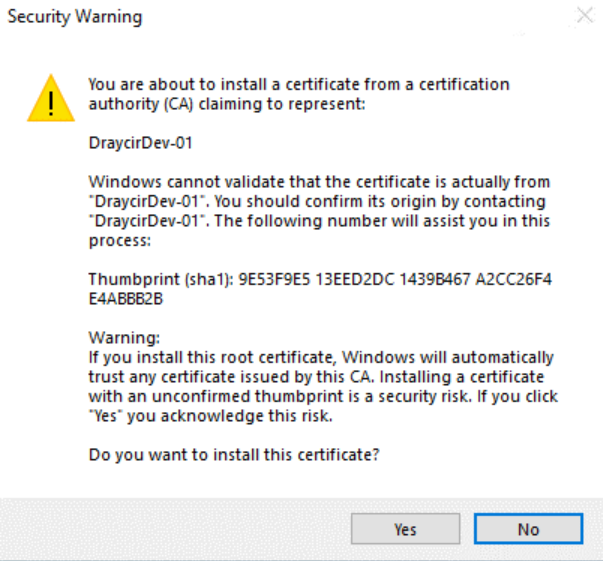
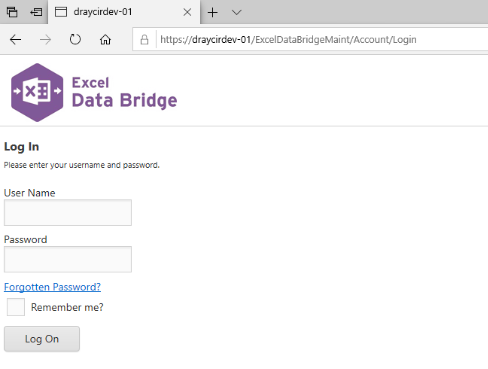
Once the certificate has installed successfully, browse to https://servername/ExcelDataBridgeMaint (you will need to close your browser and re-open when trying this).
The page will display with no security warnings as we had at the start of this topic:
Step 5: Update EDB to work with HTTPS
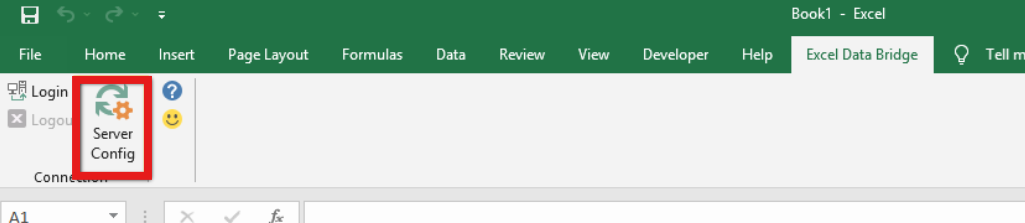
Open Excel, and under the EDB ribbon item, press Server Config.
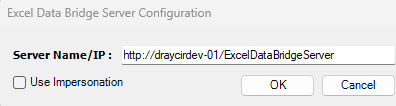
Within the EDB Server Configuration form, enter the following URL in the format https://servername/ExcelDataBridgeServer.
Click OK.
Close Excel and re-open. Now, EDB has been configured to HTTPS.
Knowledgebase Article Details
| Related Product | Excel Data Bridge |
| Ref Number | KBA-13-02-004 |
| Document Date | 09-07-2026 |
| Original Author | Navneet Dhami |
| Document Version | v1.0 |
| Last updated | 09-07-2026 |
| Update Author | Navneet Dhami |
Was this article helpful?
That’s Great!
Thank you for your feedback
Sorry! We couldn't be helpful
Thank you for your feedback
Feedback sent
We appreciate your effort and will try to fix the article