Microsoft App Registration
- Contents
- Register an application
- Additional Resources
It is recommended that the following guide is completed by an IT professional with experience of Microsoft 365 and Azure .
This guide provides instructions on how to register Spindle Requisitions as an app in the Azure portal so the Microsoft identity platform can provide authentication and authorisation services for your application and its users.
Register an application
Registering your application establishes a trust relationship between Spindle Requisitions and the Microsoft identity platform. The trust is unidirectional: Spindle Requisitions trusts the Microsoft identity platform, and not the other way around.
Follow these steps to create the app registration:
1. Sign in to the Azure portal.
2. If you have access to multiple tenants, use the Directory + subscription filter in the top menu to select the tenant in which you want to register an application.
3. Search for and select Microsoft Entra ID (formerly Azure Active Directory).
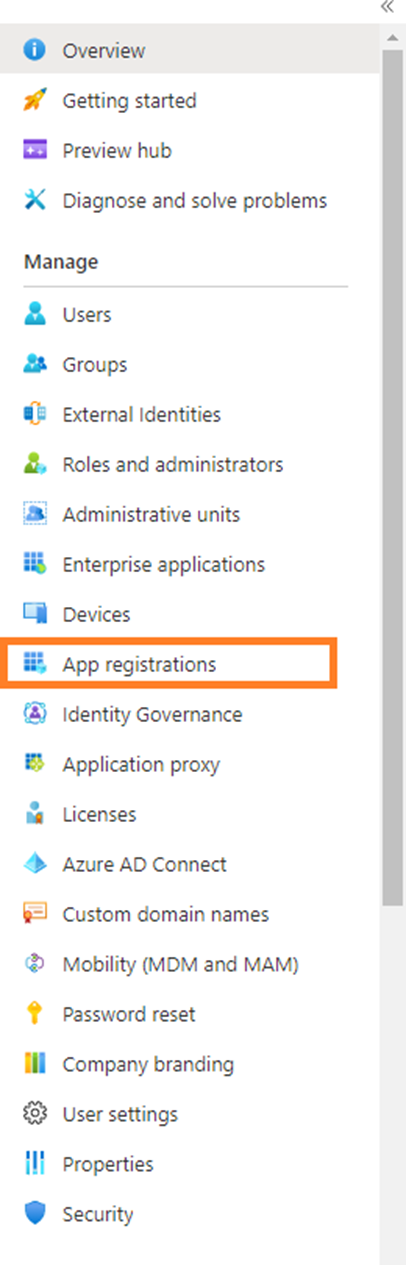
4. Under Manage, select App registrations.
5. Then select New registration.

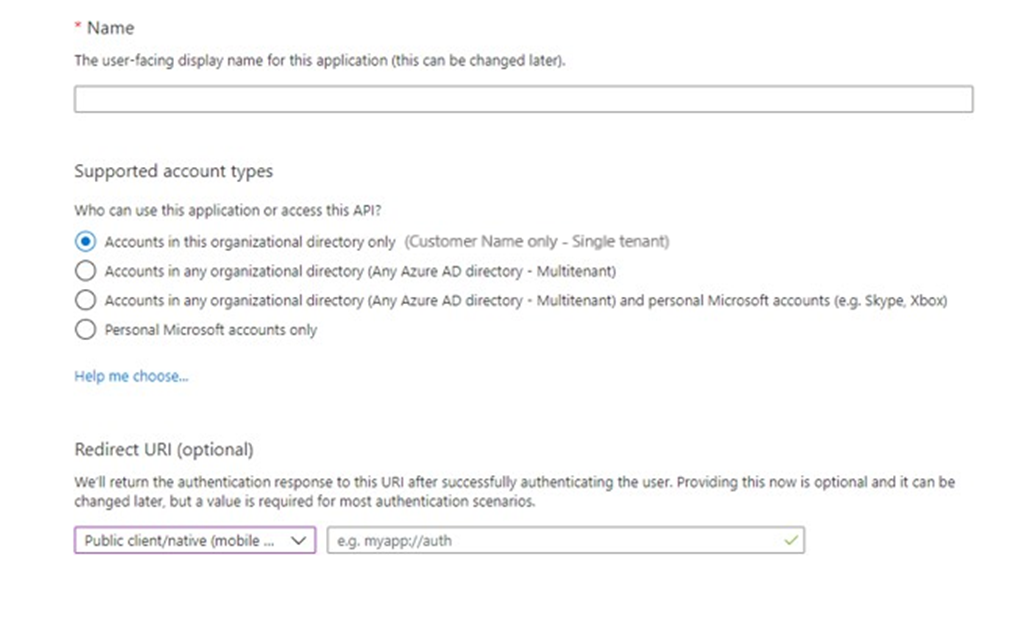
6. Enter a Name for the application, such as Spindle Requisitions, and select the Support Account Types, this should cover the account that needs access or needs to be accessed by the resource.
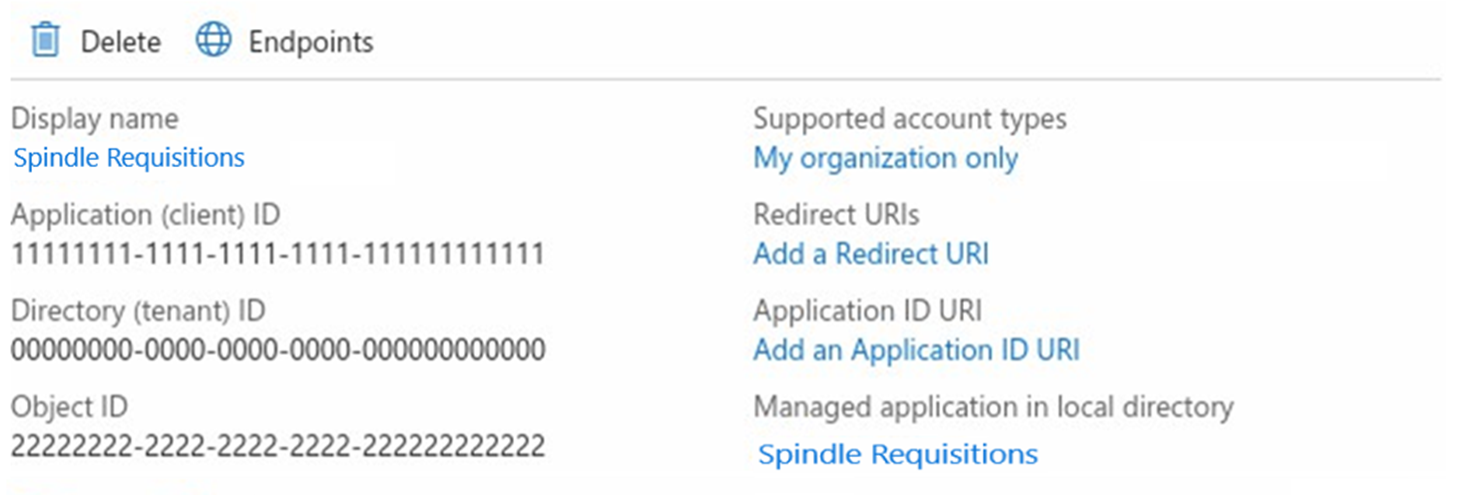
7. Once the App is created take a note of the Application ID (Client ID) and your Directory ID (Tenant ID), available in the overview section
8. Under Manage, select Certificates and Secrets.
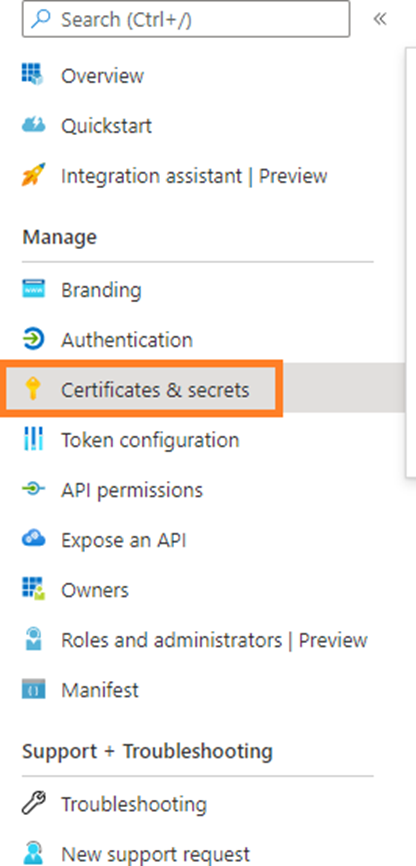
9. Then select New client secret.

10. Enter a Name for the client secret and select when you would like it to expire. If you select an expiry you must regenerate the secret and re apply it before the end of period. In live tenants, the option of 'Never' is no longer available, the maximum length of time is based on security settings configured for the tenant.
![]()
11. IMPORTANT! Once the secret has been generated, the secret value will be shown on screen, please take note or copy at this point, as it will not be shown again. Ensure you copy the secret Value and not its ID.
The secret value should be kept as secure as possible, it is recommended that the secret is generated and copied directly into the application or onto the computer, where is it going to be used.
12. Under Manage, select API Permissions.
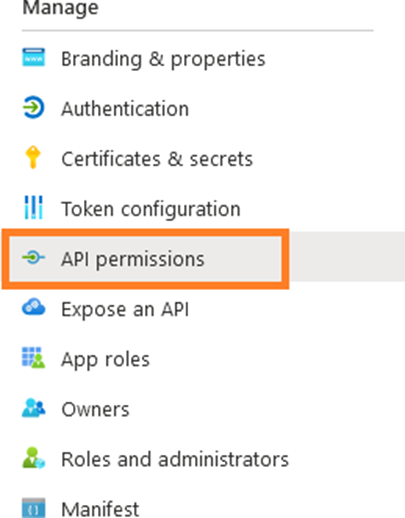
13. Add permissions as required, using the Add a permission button

14. By default, the page opens at the Microsoft APIs overview.
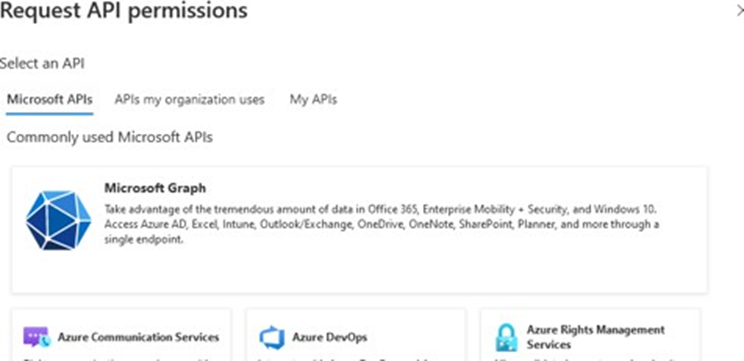
15. Select APIs my organization uses.

16. Either scroll for the permissions needed or use the search feature. The search must match exactly.

17. Select Application permissions as Spindle Requisitions sends mail in the background.

18. Tick the permissions needed, as Exchange Web Services are being retired in 2026 it is recommended that Graph is used:
| API permission name | Microsoft Graph – Mail.Send |
| Type | Application |
| Description | App-only permission to send mail as any mailbox the app is allowed to access |
19. When the permissions are initially added, they won’t work right away if they require admin approval. Even though the permissions appear in the list, they won’t actually be usable until an administrator grants them.

20. To Grant Permissions use the Grant admin Consent button at the top.

To Grant Permissions you must be a Global Administrator of the tenant.
21. Use the Application ID (App Id), Directory ID (Tenant Id) and the secret value (Secret Value) to configure your application to authenticate using OAuth2 (OAuth2.0), all values should be unique.
API and permissions for services or daemon applications can give unrestricted access to a resource. Microsoft has introduced Role Based Access Control (RBAC) for Applications as the preferred method for restricting application permissions in Exchange Online. RBAC for Applications replaces the legacy Application Access Policy model and provides more granular, flexible, and maintainable controls over which mailboxes an application can access. You may need to consider using an RBAC for Applications or Application Access Policy for a more granular level of security permissions.
Additional Resources
• Roles Based Access Control for Applications in Exchange Online https://learn.microsoft.com/en-us/exchange/permissions-exo/application-rbac
• Microsoft Quick start App Registration - https://docs.microsoft.com/en-us/azure/active-directory/develop/quickstart-register-app
• Limiting application permissions to specific Exchange Online mailboxes https://learn.microsoft.com/en-us/graph/auth-limitmailbox-access
• Connect to Exchange Online PowerShell https://learn.microsoft.com/en-us/powershell/exchange/connect-to-exchange-onlinepowershell?view=exchange-ps&preserve-view=true
• New-ApplicationAccessPolicy https://learn.microsoft.com/en-gb/powershell/module/exchange/new-applicationaccesspolicy? view=exchange-ps
• Announcement about support in EWS https://techcommunity.microsoft.com/t5/exchange-team-blog/application-access-policysupport-in-ews/ba-p/2110361
Was this article helpful?
That’s Great!
Thank you for your feedback
Sorry! We couldn't be helpful
Thank you for your feedback
Feedback sent
We appreciate your effort and will try to fix the article